mewtwowarrior (![[personal profile]](https://www.dreamwidth.org/img/silk/identity/user.png) mewtwowarrior) wrote2012-04-24 12:47 am
mewtwowarrior) wrote2012-04-24 12:47 am
Entry tags:
Mewtwo Plays Tron Evolution DS Part 1
Here's part one of what goes on in Tron Evolution DS.
Be warned, it's image-heavy. I did my best to cut down on the number of images by combining screenshots together.
When there's longer conversations, I've linked the images to the original so you can read it easier.
Please feel free to post any comments, questions, critiques, or discussions on anything I've put in this post! :D
I hope you enjoy! ^_^
Here's some of the options for your character. I didn't focus on the face and hair options because you can't see it too well, but I did want to show all the body suit choices.
Male Player Character


Female Player Character


Also, every time you change one of the options, the character does a little "check me out" sort of thing that changes depending on what you swap. There's different animations for the face, hair style, and body suit choices and they're different for the guy and girl. It's a little detail that's pretty cute, but you're only going to see them when you make your character, they're never shown again. I rather like it, but I kind of overlooked it the first couple of times I played the game.
I put together a quick video of all the reaction animations and placed it on YouTube here.
I'm also going to attempt to embed it here:
It makes me wonder if Programs are aware of all the changes that they go through until the final product is ready. The characters you make are System Monitors, it's possible that maybe it's related to that.
Another interesting thing to note is the level of detail on the circuits on the suit. They're not really seen much in the regular gameplay.
Here's my Player Character that I'll be using for the playthrough:

Once you get your character set up and the game saves, you're dropped into the game.

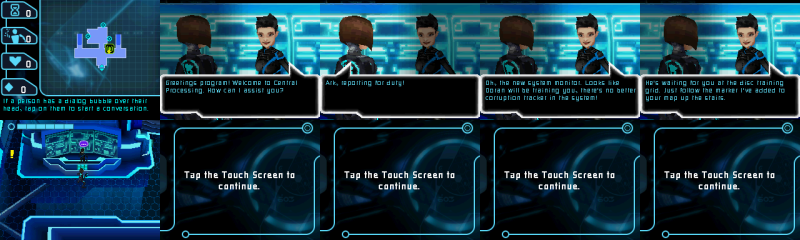
This is the first thing you see in the game. The top screen gives you lots of interesting information.
The four icons on the left will come into play later. The first three are abilities you pick up and the bottom one is the number of Bits (the currency in the game) that you have.
The biggest part of the top screen is taken up by the map. The map is VERY useful and lets you know where enemies, things to interact with, where to go, and what you need to do to do your objective. Where you need to go is indicated by the black and green icon. In this case, it's the receptionist behind the desk. Also of note, the yellow diamond is the location of the player character.
The bottom screen is where all the action takes place. The bar at the top of the screen is your health.

There's a few interesting things of note from this conversation. First, whoever is talking has something of a spotlight on them. Second, the Player Character's circuits are a lighter teal blue than the receptionist's darker blue.
Finally, your character is named whatever your DS is named. I think it's a neat little touch.

As you play through the game, you get items for something called DGamer, where you put together a little avatar. Once we're done with the game, I'll show all the Tron-themed items you earn.
One thing to note, every time you restart the game, every item you've earned for DGamer goes away until you earn them again, according to what the game says. I think this is rather silly and they could have added more items for beating the game more than once.

If you try to go up the other staircase, the receptionist stops you.

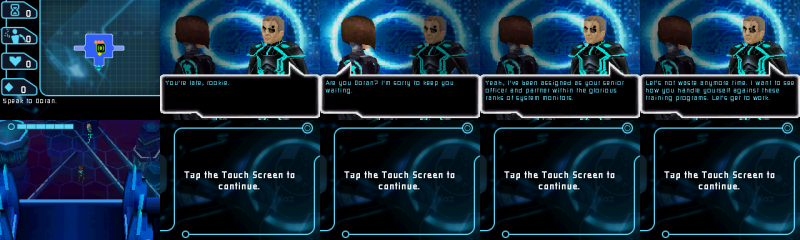
You come to this room and meet Doran. He's pretty cool. I THINK he has an eyepatch, but it's really hard to tell. Either way, I like to think he has one.
He's also got the teal circuits of a System Monitor. The orange diamonds on the map are enemies, in this case, they're Programs for you to train against.

Here's how you fight in Tron Evolution DS. The instructions seem to be a little wrong, because all I've done is tap on an enemy to throw the disc instead of sliding the stylus.
The training Programs have the darker blue circuits.

The derezzing effect is pretty neat when you get a chance to watch it. During most of the game, you're fighting for your life, so it's hard to pay attention to it.

Next you learn how to block. It's sometimes a useful ability, but often you're surrounded by multiple Programs trying to kill you, so I don't use it all that much.


Here comes Tron! He seems to have the teal blue circuits also, but it's really hard to tell. He gives us our assignment and we're off to a new area.

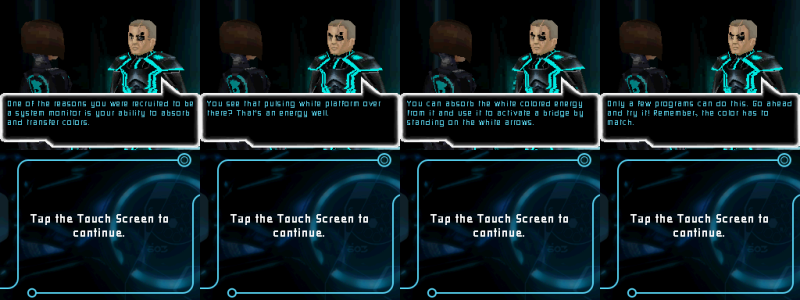
You don't get a good look at the new area until after Doran gives you some information.
This conversation is interesting because it reveals a few things. First, some programs have the ability to absorb and transfer colors. Second, having special abilities seems to be a plus when it comes to becoming a System Monitor.
The absorbing and transferring colors only makes sense from a gameplay standpoint, not a story one. Later in the game, you're in life or death circumstances and having to absorb colors to make bridges and get past barriers.
Since it's a rare ability, it doesn't make sense to have this setup all over the place. If other, regular, Programs got stuck in those places, they'd be in a whole lot of trouble.

I like that when you absorb colors from an energy well, your character does the classic disc-raising position.
Every energy well is marked on the maps with their color. It's pretty handy.
Also, I like the way the white bridge looks.

You enter another room and have another energy well-based task.

The only way to jump in the game is to run up against a gap. I have a love/hate relationship with this, because sometimes I just want to jump, darn it. But, also, it means less messing up the jumps you need to make, unless you don't line yourself up properly.
Also, your character does a fancy flippy jump in order to make it across gaps.

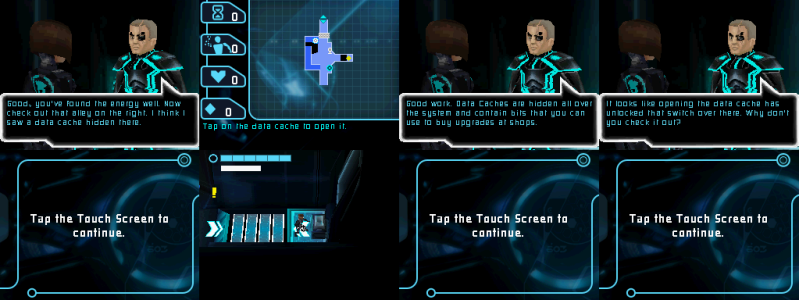
You're introduced to the first way of making money/Bits in the game. Data caches are placed throughout the areas and give a handful of Bits every time you open one.
I think this is the only time in the game that one is necessary, though Bits are VERY handy to have.

Next we meet switches. They appear quite a few times throughout the game in all sorts of different colors.
They're marked on the map with what colors they are.
The lines that extend from the switch to what they activate reminds me a LOT of Portal. The buttons in the Portal series always have a line that leads to what they affect and light up when activated.
One the switch is hit, the barrier across the hallway vanishes.


Now it's time for the first upgrade! What Doran says about it bugs me, he says it's weaker, but there's no way to switch back to the regular disc (that I've found) once you obtain the Guided Disc. However, you never fight a "real" enemy with the regular disc, so there's no way to compare.
The Guided Disc has a few quirks to it that can make it a bit annoying. Sometimes it's a little hard to control where it goes.

Doran gives you a truth and a lie. The Guided Disc is useful throughout nearly the entire game for switches and combat. However, I'm pretty sure it's actually impossible in gameplay to hit the switch without guiding the disc. (In story, however, probably a skilled Program could hit the switch, most likely by banking the disk off the walls.)
Once you hit the switch, the barrier vanishes and you're free to go to the next area.

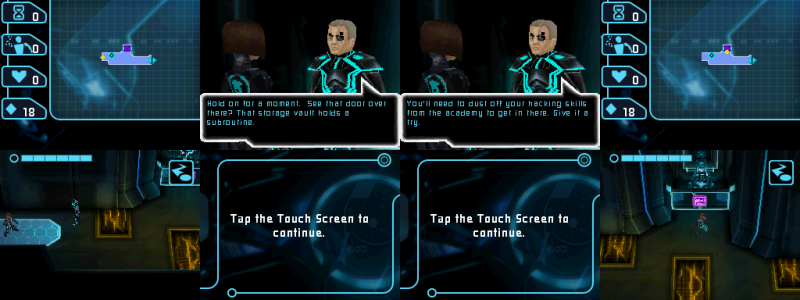
Doran greets you when you enter this room. He brings up something quite interesting. This is the only point in the game where an academy is mentioned. It's unknown if it's for all Programs or just for System Monitors. It's mentioned that hacking is somehow taught, but anything else learned there is unknown.
The yellow spots on the ground will injure you if you walk on top of them.

Hacking is fairly simple in the game. It starts out with easy puzzles and slowly get harder. All you have to do is connect the tiles with the same colors. Right now, we just have one color, but later it'll get up to three.
One of the colored tiles will send out its color and the other receives it. If the receiver tile gets the wrong color sent to it, the hack will fail and you have to start over.

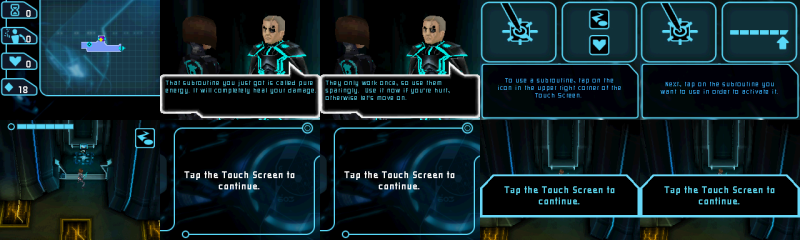
And here we've gotten another DGamer reward.

The subroutine we get is a healing one. It's my second-favorite out of the three and it's VERY useful. Later you can buy them in shops, and the price is pretty cheap because it's the first one. I'll be using them whenever I can.
Once you get the subroutine, you can move on to the next room.
Be warned, it's image-heavy. I did my best to cut down on the number of images by combining screenshots together.
When there's longer conversations, I've linked the images to the original so you can read it easier.
Please feel free to post any comments, questions, critiques, or discussions on anything I've put in this post! :D
I hope you enjoy! ^_^
Here's some of the options for your character. I didn't focus on the face and hair options because you can't see it too well, but I did want to show all the body suit choices.
Male Player Character
Female Player Character
Also, every time you change one of the options, the character does a little "check me out" sort of thing that changes depending on what you swap. There's different animations for the face, hair style, and body suit choices and they're different for the guy and girl. It's a little detail that's pretty cute, but you're only going to see them when you make your character, they're never shown again. I rather like it, but I kind of overlooked it the first couple of times I played the game.
I put together a quick video of all the reaction animations and placed it on YouTube here.
I'm also going to attempt to embed it here:
It makes me wonder if Programs are aware of all the changes that they go through until the final product is ready. The characters you make are System Monitors, it's possible that maybe it's related to that.
Another interesting thing to note is the level of detail on the circuits on the suit. They're not really seen much in the regular gameplay.
Here's my Player Character that I'll be using for the playthrough:
Once you get your character set up and the game saves, you're dropped into the game.
This is the first thing you see in the game. The top screen gives you lots of interesting information.
The four icons on the left will come into play later. The first three are abilities you pick up and the bottom one is the number of Bits (the currency in the game) that you have.
The biggest part of the top screen is taken up by the map. The map is VERY useful and lets you know where enemies, things to interact with, where to go, and what you need to do to do your objective. Where you need to go is indicated by the black and green icon. In this case, it's the receptionist behind the desk. Also of note, the yellow diamond is the location of the player character.
The bottom screen is where all the action takes place. The bar at the top of the screen is your health.
There's a few interesting things of note from this conversation. First, whoever is talking has something of a spotlight on them. Second, the Player Character's circuits are a lighter teal blue than the receptionist's darker blue.
Finally, your character is named whatever your DS is named. I think it's a neat little touch.
As you play through the game, you get items for something called DGamer, where you put together a little avatar. Once we're done with the game, I'll show all the Tron-themed items you earn.
One thing to note, every time you restart the game, every item you've earned for DGamer goes away until you earn them again, according to what the game says. I think this is rather silly and they could have added more items for beating the game more than once.
If you try to go up the other staircase, the receptionist stops you.
You come to this room and meet Doran. He's pretty cool. I THINK he has an eyepatch, but it's really hard to tell. Either way, I like to think he has one.
He's also got the teal circuits of a System Monitor. The orange diamonds on the map are enemies, in this case, they're Programs for you to train against.
Here's how you fight in Tron Evolution DS. The instructions seem to be a little wrong, because all I've done is tap on an enemy to throw the disc instead of sliding the stylus.
The training Programs have the darker blue circuits.
The derezzing effect is pretty neat when you get a chance to watch it. During most of the game, you're fighting for your life, so it's hard to pay attention to it.
Next you learn how to block. It's sometimes a useful ability, but often you're surrounded by multiple Programs trying to kill you, so I don't use it all that much.
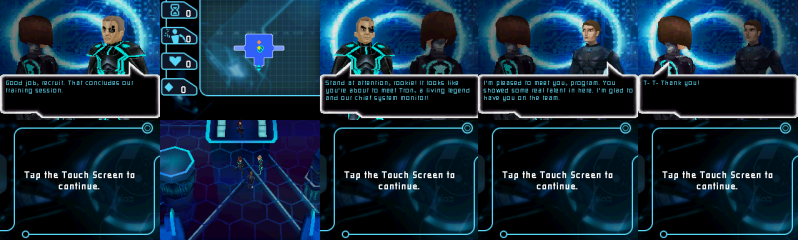

Here comes Tron! He seems to have the teal blue circuits also, but it's really hard to tell. He gives us our assignment and we're off to a new area.
You don't get a good look at the new area until after Doran gives you some information.
This conversation is interesting because it reveals a few things. First, some programs have the ability to absorb and transfer colors. Second, having special abilities seems to be a plus when it comes to becoming a System Monitor.
The absorbing and transferring colors only makes sense from a gameplay standpoint, not a story one. Later in the game, you're in life or death circumstances and having to absorb colors to make bridges and get past barriers.
Since it's a rare ability, it doesn't make sense to have this setup all over the place. If other, regular, Programs got stuck in those places, they'd be in a whole lot of trouble.
I like that when you absorb colors from an energy well, your character does the classic disc-raising position.
Every energy well is marked on the maps with their color. It's pretty handy.
Also, I like the way the white bridge looks.
You enter another room and have another energy well-based task.
The only way to jump in the game is to run up against a gap. I have a love/hate relationship with this, because sometimes I just want to jump, darn it. But, also, it means less messing up the jumps you need to make, unless you don't line yourself up properly.
Also, your character does a fancy flippy jump in order to make it across gaps.
You're introduced to the first way of making money/Bits in the game. Data caches are placed throughout the areas and give a handful of Bits every time you open one.
I think this is the only time in the game that one is necessary, though Bits are VERY handy to have.
Next we meet switches. They appear quite a few times throughout the game in all sorts of different colors.
They're marked on the map with what colors they are.
The lines that extend from the switch to what they activate reminds me a LOT of Portal. The buttons in the Portal series always have a line that leads to what they affect and light up when activated.
One the switch is hit, the barrier across the hallway vanishes.
Now it's time for the first upgrade! What Doran says about it bugs me, he says it's weaker, but there's no way to switch back to the regular disc (that I've found) once you obtain the Guided Disc. However, you never fight a "real" enemy with the regular disc, so there's no way to compare.
The Guided Disc has a few quirks to it that can make it a bit annoying. Sometimes it's a little hard to control where it goes.
Doran gives you a truth and a lie. The Guided Disc is useful throughout nearly the entire game for switches and combat. However, I'm pretty sure it's actually impossible in gameplay to hit the switch without guiding the disc. (In story, however, probably a skilled Program could hit the switch, most likely by banking the disk off the walls.)
Once you hit the switch, the barrier vanishes and you're free to go to the next area.
Doran greets you when you enter this room. He brings up something quite interesting. This is the only point in the game where an academy is mentioned. It's unknown if it's for all Programs or just for System Monitors. It's mentioned that hacking is somehow taught, but anything else learned there is unknown.
The yellow spots on the ground will injure you if you walk on top of them.
Hacking is fairly simple in the game. It starts out with easy puzzles and slowly get harder. All you have to do is connect the tiles with the same colors. Right now, we just have one color, but later it'll get up to three.
One of the colored tiles will send out its color and the other receives it. If the receiver tile gets the wrong color sent to it, the hack will fail and you have to start over.
And here we've gotten another DGamer reward.
The subroutine we get is a healing one. It's my second-favorite out of the three and it's VERY useful. Later you can buy them in shops, and the price is pretty cheap because it's the first one. I'll be using them whenever I can.
Once you get the subroutine, you can move on to the next room.